

Marketing teams still spend too much time managing calendars, seeking approvals, and posting content manually. This friction slows your campaigns, disrupts your messaging, and wastes hours better spent on strategy.
A well-designed content calendar with automated scheduling turns planning from a coordination headache into a predictable engine. By aligning themes, deadlines, and distribution rules up front, teams regain creative bandwidth and reduce costly last-minute errors. Picture a product launch where publishing rules, asset links, and audience segments flow automatically into each channel instead of relying on ad-hoc spreadsheets.
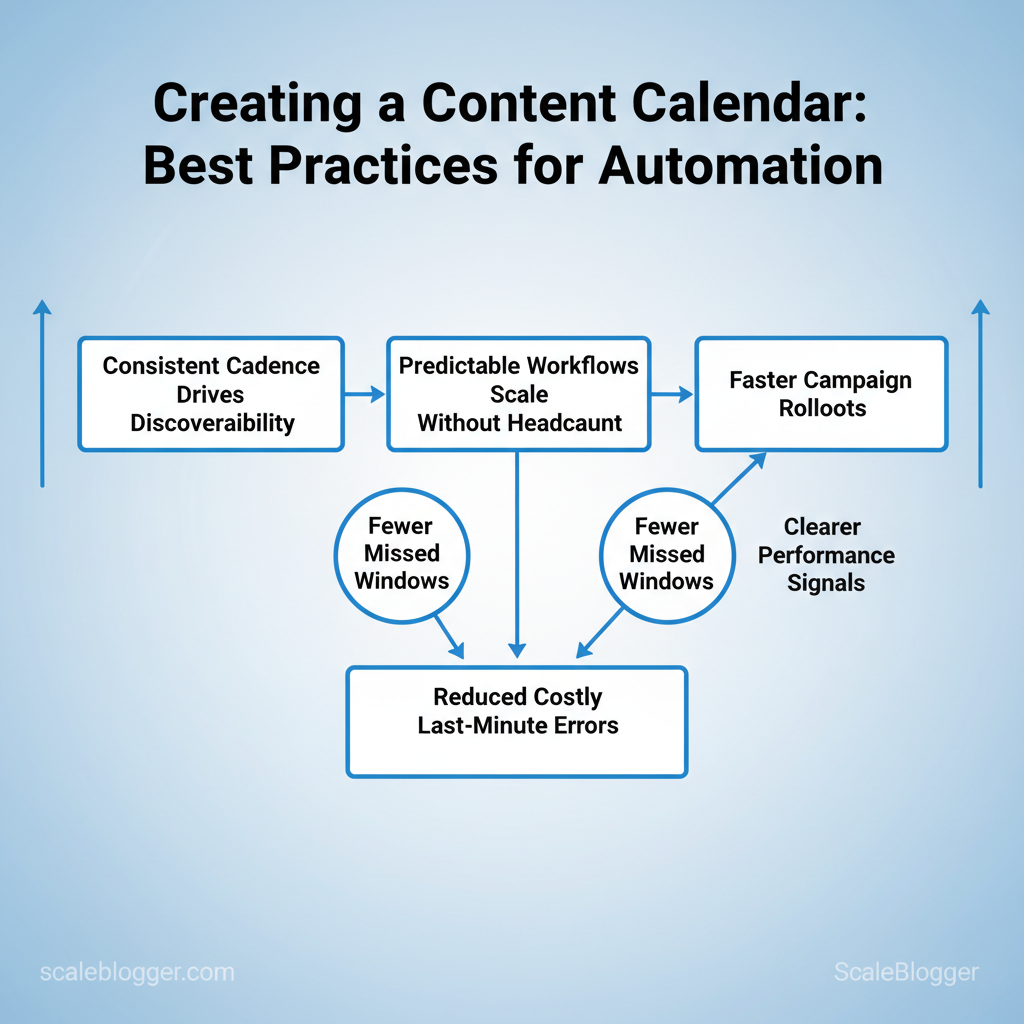
This matters because consistent cadence drives discoverability, and predictable workflows scale without adding headcount. Organizations that adopt disciplined content planning see faster campaign rollouts, fewer missed windows, and clearer performance signals.
* How to map content types and publishing frequency to business goals
- Which automation rules eliminate repetitive scheduling work without losing control
- Simple templates and triggers that preserve editorial quality at scale
- How to integrate your CMS, calendar, and analytics for one source of truth
Practical steps follow to build a calendar that automates routine tasks while keeping editorial judgment central. Explore Scaleblogger’s automation services to accelerate your content calendar: https://scaleblogger.com
> Key Takeaway: ## Prerequisites & What You’ll Need
Begin by obtaining the accounts, permissions, and basic skills needed for a reliable AI-driven content pipeline. The tasks are divided into two areas: technical prerequisites (like APIs and CMS access) and…
Prerequisites & What You’ll Need
Begin by obtaining the accounts, permissions, and basic skills needed for a reliable AI-driven content pipeline. The tasks are divided into two areas: technical prerequisites (like APIs and CMS access) and team prerequisites (who manages content, publishes, and maintains automation). Ensure you have these set up before designing templates or rules. A small permission missing later can double your time.
Tools and materials
- Accounts: CMS, social scheduler, analytics, and source-control where relevant. Technical access: API keys, webhook endpoints, and a sandbox/staging CMS environment. Skills: Spreadsheet automation, basic JavaScript/Python for light scripts, familiarity with CMS templating.
- Team roles: Editorial owner, publishing admin, developer/automation owner, analytics owner. com) for AI content automation.
Step-by-step setup (30–90 minutes per item depending on org size)
- ,
VAULT_CONTENT_API_KEY). 2.
Grant CMS publishing access to the publishing admin and create a staging site for tests. 3. Provision social scheduler accounts and generate posting tokens.
- Validate API/webhook endpoints with a test payload. 5.
Assign an editorial calendar owner responsible for cadence and topic mapping.
Quick examples and templates > Market teams routinely reduce publish friction by separating “content owner” and “publisher” roles so editorial changes don’t get blocked by access issues.
Example webhook payload to validate delivery:
json { "event":"article.create", "title":"How to automate topic clusters", "draft":true, "author_id":42 }Quick checklist mapping each prerequisite to why it matters and who should own it
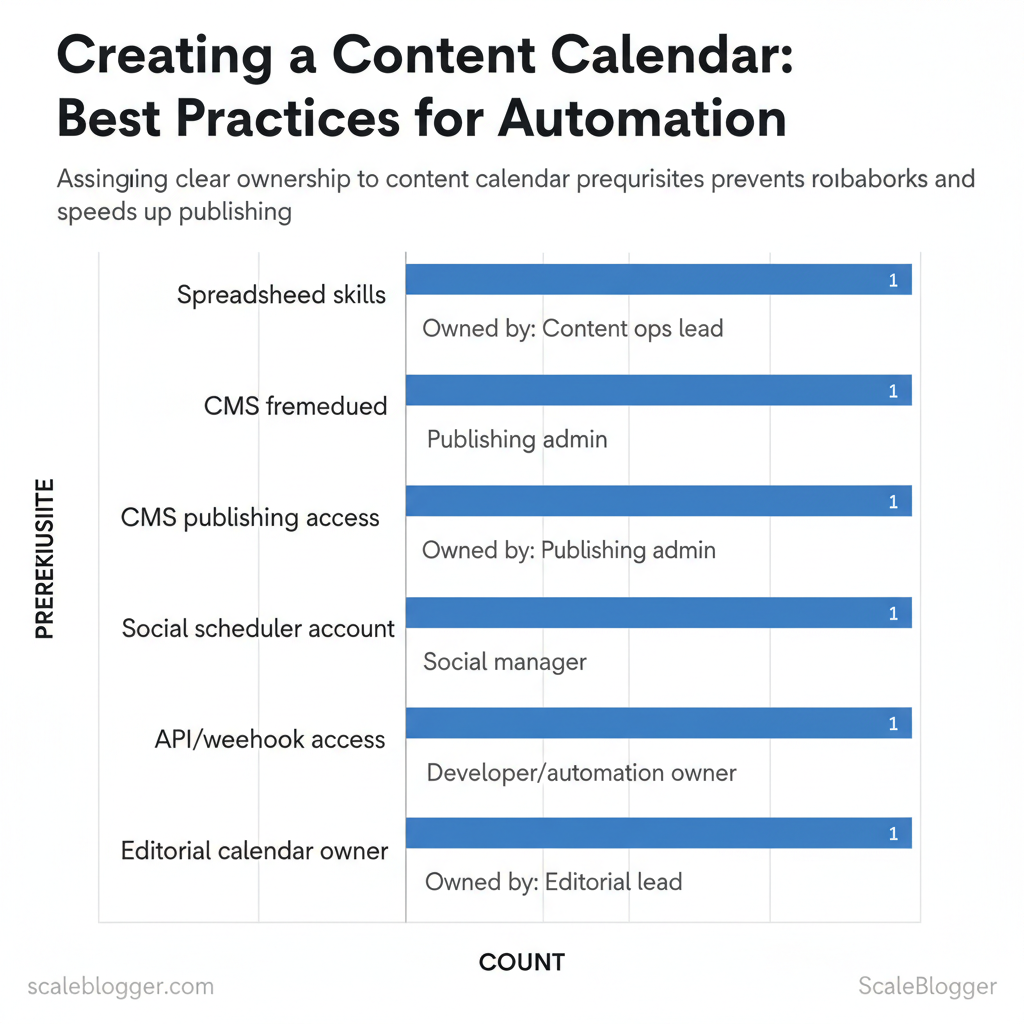
| Prerequisite | Required/Optional | Who should own it | Why it matters |
|---|---|---|---|
| Spreadsheet skills | Required | Content ops lead | Enables templates, IMPORTXML, and CSV exports |
| CMS publishing access | Required | Publishing admin | Needed to push live posts and manage redirects |
| Social scheduler account | Required | Social manager | Automates distribution (Meta/Twitter/X/LinkedIn tokens) |
| API/webhook access | Required | Developer/automation owner | Integrates content creation with tooling; test endpoints |
| Editorial calendar owner | Required | Editorial lead | Maintains cadence, topics, and approvals |
Understanding and implementing these prerequisites prevents needless rework and speeds iteration, which ultimately keeps the content engine humming without constant firefighting. When teams set permissions, test integrations, and name owners upfront, automation becomes an accelerant rather than a liability.
> Key Takeaway: ## Step-by-Step: Designing Your Content Calendar Structure
Begin by selecting 3–5 content pillars that reflect the audience’s needs, business goals, and high-ROI topics. Next, connect each pillar to specific channels and a practical publishing…
Step-by-Step: Designing Your Content Calendar Structure
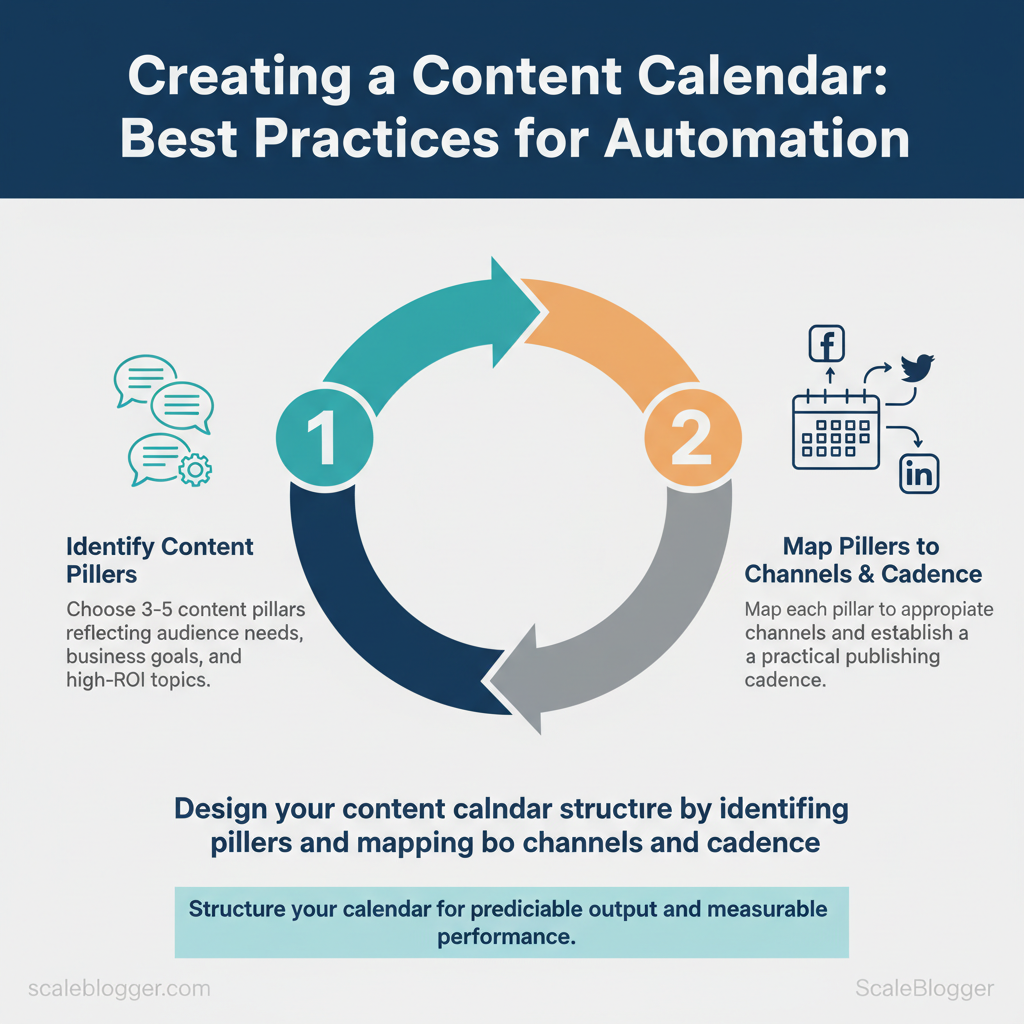
Begin by selecting 3–5 content pillars that reflect the audience’s needs, business goals, and high-ROI topics. Next, connect each pillar to specific channels and a practical publishing schedule so the team can publish consistently and measure results. A calendar that’s too detailed requires too much maintenance, while one that’s too vague leads to inconsistent results.
Here’s a step-by-step guide to setting up your structure, including the necessary metadata for automation and channel-specific cadence examples you can use right away.
Prerequisites
- Audience research: 2–3 buyer personas and top intent keywords per persona. Analytics access: GA4, Search Console, and social insights. Content inventory: list of existing assets and performance baseline.
- Tools: spreadsheet or calendar tool, plus
Zapier/Makefor basic automation.
Tools and materials
- Editorial calendar template (Google Sheets or Airtable). 2.
CMS with scheduling API (WordPress, Contentful). 3. Social scheduler (native/X, LinkedIn Scheduler, Buffer).
- com for AI content automation).
Step-by-step setup (estimated time: 2–6 hours to implement)
- Identify pillars (30–60 minutes)
- List candidate topics from audience needs.
- Prioritize by business impact and search potential. 3.
, Growth Ops, SEO Tactics, Case Studies). Expected outcome: clear topical guardrails for the next 6 months. 2.
Assign channels and cadence (30–60 minutes)
- Map which pillar fits which channel (see table below). 2.
Set initial cadence per channel (pilot for 8–12 weeks). Visual cue: a filled row per pillar in calendar indicates readiness. 3.
Define standard metadata for automation (45–90 minutes)
- Required fields:
title,slug,publish_date,author,pillar,format,primary_keyword,tags,status,CTA. 2.
Optional fields: repurpose_plan, video_script_id, estimated_read_time. Expected outcome: templates that feed scheduling and repurposing workflows. 4.
Create repurposing rules (30–60 minutes)
- Decide what assets convert into 2–4 micro-posts, a newsletter blurb, and a video brief. Troubleshooting: if cadence slips, reduce frequency or automate more of the metadata population.
Recommended cadence and metadata requirements by channel (automated scheduling cadence)
Table: Section Content — Channel, Recommended Cadence, Must-have Metadata & more
| Channel | Recommended Cadence | Must-have Metadata | Example CTA |
|---|---|---|---|
| Blog | 1–2 posts/week | title, slug, publish_date, pillar, primary_keyword |
Read more → Download template |
| Twitter/X or LinkedIn | Daily–3x/week | post_text, image, pillar, post_time, cta_link |
Discuss this → Join thread |
| Newsletter | 1–2x/month | subject, send_date, lead_story, cta_link, audience_segment |
Get it → Subscribe |
| YouTube/Long-form Video | 1–4/month | title, script_id, publish_date, thumbnail, pillar |
Watch now → Subscribe |
| Repurposed Content | 2–5 micro-assets/asset | source_id, format, channel, scheduled_date |
Share → Read full post |
pillar and repurpose_plan fields into the CMS to unlock automated workflows with tools like Scaleblogger.com and reduce friction across publishing. Understanding these principles helps teams move faster without sacrificing quality.
> Key Takeaway: ## Step-by-Step: Tool Selection & Setup for Automation
Start by matching tool capability to team complexity: small teams need low-friction solutions that minimize maintenance, while enterprises require scalable, secure integrations and…
Step-by-Step: Tool Selection & Setup for Automation
Start by matching tool capability to team complexity: small teams need low-friction solutions that minimize maintenance, while enterprises require scalable, secure integrations and observability. Choose tools that reduce manual coordination, provide predictable APIs or native connectors, and map directly to the content lifecycle stages you want to automate (ideation → creation → review → publish → measure).
Prerequisites
- Team inventory: list roles, access levels, and technical skills. Process map: a simple flow of your current content ops. KPIs: publishing cadence, average turnaround, traffic targets.
- Budget range: monthly and one-time integration costs.
Tools & materials
- Core platforms: CMS, editorial database, scheduler, social posting tool, automation/orchestration layer.
- Integration utilities:
Zapier,Make,Workato, or custom scripts using REST/webhooks. - Credentials: API keys, OAuth admin accounts, workspace permissions.
- Choose your stack by team size and complexity
- For small teams, pick low-setup stacks (Google Sheets + Zapier + Buffer) to move quickly.
- For growing teams, adopt workspace-first tools (Notion + Make + Hootsuite) that scale.
- For enterprises, prioritize security and SLAs (CMS + Workato + enterprise social platform).
- Evaluate integration trade-offs
- Native connectors: faster to deploy, lower maintenance, but can lock you to vendor features.
- API-based automation: more flexible and future-proof, requires engineering resources.
- Run a pilot
- Automate one repeatable workflow (e.g., draft → review reminder → publish).
- Measure time saved, errors reduced, and stakeholder satisfaction.
- Confirm successful connections (checklist)
- Authentication verified: API calls return 200 and expected payloads.
- Data mapping validated: fields match (title, slug, publish_date).
- Error handling in place: retries and alerting configured.
- Access controls set: least-privilege API keys, role-based permissions.
- Audit logs enabled: track who triggered automated publishes.
Quick webhook example for a publish trigger:
bash curl -X POST https://cms.example.com/api/publish \ -H "Authorization: Bearer $API_KEY" \ -H "Content-Type: application/json" \ -d '{"slug":"how-to-automate","publish_date":"2025-06-01T10:00:00Z"}'Side-by-side comparison of common tool stacks for small, medium, and enterprise teams
| Stack | Best For | Pros | Cons |
|---|---|---|---|
| Google Sheets + Zapier + Buffer | Solo/small teams | Low setup, $0–$20/mo, quick templates | Limited scaling, rate limits |
| Notion + Make + Hootsuite | Small/medium teams | Flexible databases, moderate cost, visual flows | Requires setup time, API quirks |
| CMS (e.g., WordPress) + Workato + Social Platform | Enterprise | SLA, security, advanced connectors | Higher cost, needs engineering |
| Airtable + Custom scripts + Scheduler | Headless/content ops teams | Custom schemas, strong API, automation hooks | Requires dev resources, maintenance |
| Trello + Zapier + Native schedulers | No-code focused teams | Familiar UI, free tiers, easy automations | Less granular content metadata |
Understanding these principles helps teams move faster without sacrificing quality. When implemented correctly, this approach reduces overhead by making decisions at the team level.
Step-by-Step: Building Automated Workflows
First, define a single repeatable outcome, like publishing a keyword-optimized blog post or routing leads to a CRM. Start by outlining your workflow around that outcome, keeping each automation straightforward: one trigger, one decision, and one set of actions. This makes it easier to manage changes and verify results.
- Identify trigger and goal (10–20 minutes)
- Map required data fields (15–30 minutes)
- Configure actions and naming conventions (30–60 minutes)
- Test, verify, and enable (30–90 minutes)
- Monitor and iterate (ongoing)
Common automation workflows (with examples)
- Content creation pipeline: Trigger — new row in
Content Briefssheet; Action — runAI draftjob, create Google Doc, assign editor. SEO refresh cadence: Trigger — content older than 12 months flagged; Action — fetch performance metrics, generate update suggestions, schedule update task. Lead routing: Trigger — form submission withlead_score >= 50; Action — create CRM contact, add to nurture sequence, notify rep.
- Social promotion: Trigger — published blog post; Action — generate 4 social snippets, schedule on platform queue.
Sample field mappings and naming conventions
- Bold lead-in — Field mapping:
sheet.title→doc.title;sheet.keywords→doc.tags. - Bold lead-in — Timestamping: use
YYYYMMDD_HHMMfor versions to avoid collision. - Bold lead-in — Task names:
wf.content-draft: [topic] — v{n}for readable audit trails.
Example JSON-style mapping template
json { "trigger": "sheet_row_created", "mappings": { "sheet.title": "doc.title", "sheet.brief": "doc.body", "sheet.author": "doc.owner_email" }, "naming": { "doc": "{YYYYMMDD}_{slug}_{author}", "task": "wf.publish:{slug}:v{n}" } }Verification steps and rollback considerations
- Bold lead-in — Dry-run: Execute with test rows and
test_mode=true. - Bold lead-in — Assertions: Verify
doc.owner_emailmatches expected account andtagspopulated. - Bold lead-in — Rollback: Maintain idempotent actions and a
revertscript that deletes created docs and resets sheet flags.
Operational tips: keep workflows small, log every action, and set alert thresholds for failures. Tools that combine scheduling, AI drafting, and publishing reduce integration overhead—consider AI content automation from Scaleblogger.com when centralizing a content pipeline. Understanding these principles helps teams move faster without sacrificing quality.
Step-by-Step: Scheduling & Automated Distribution
Set timezone-aware schedules, automate UTM tagging, and define clear repurposing rules so content publishes reliably and attribution is captured everywhere. Start by agreeing on a canonical timezone, create channel-specific publish windows, and bake UTM logic into the pipeline so analytics are consistent. Then add repurposing rules that map each asset to follow-ups (social posts, newsletter excerpts, video clips) and automate those actions inside your CMS or workflow tool.
Prerequisites
- Team timezone: single canonical timezone (e.g.,
America/Los_Angeles) - Analytics baseline: GA4 property and naming conventions defined
- Tooling: scheduling-capable CMS, social scheduler, and a small automation engine (Zapier, Make, or native CMS automation)
Tools / materials needed
- CMS with scheduling (e.g., WordPress, Ghost)
- Social scheduler (Buffer/Hootsuite/X for publishers)
- Automation workflow (
Zapier/Makeor built-in scheduler) - UTM scheme template (saved in repo or content brief)
- Configure schedules
- Set the CMS site timezone to the canonical value and document it.
- Add timezone-aware publish checks in your CI or scheduling workflow.
- Create channel-specific publish windows and rate limits (table below).
- Implement UTM automation
- Standardize a UTM pattern:
?utm_source={channel}&utm_medium={format}&utm_campaign={slug}&utm_content={variant} - Automate tagging at publish-time so share links and syndicated copies inherit UTMs.
- Verify by publishing test posts and checking real-time GA4 acquisition reports.
- Define repurposing rules
- Map primary content → derived assets (blog post → 3 social posts, 1 newsletter blurb, 1 short video).
- Create frequency and variant rules: e.g., evergreen blog → repost social every 30/90/180 days with different
utm_content. - Automate content transforms when possible (headline variations, excerpt generation, clip extraction).
Practical examples
- Blog publish window: weekdays 08:00–10:00 local for organic search visibility.
- UTM snippet:
utm_source=linkedin&utm_medium=social&utm_campaign=topic-cluster-2025&utm_content=postA - Repurpose rule: blog → LinkedIn (excerpt + image) within 24 hours, X thread same day, newsletter inclusion next week.
Template of UTM structures and scheduling windows by channel
| Channel | Publish Window (local time) | UTM Template | Repurpose Rule |
|---|---|---|---|
| Blog | Mon–Fri 08:00–10:00 | ?utm_source=blog&utm_medium=organic&utm_campaign={slug} |
Convert to 3 social posts, newsletter blurb in 7 days |
| Tue–Thu 08:00–09:30 | ?utm_source=linkedin&utm_medium=social&utm_campaign={slug}&utm_content=post1 |
Post excerpt + image, repurpose as article 14d later | |
| X/Twitter | Mon–Fri 12:00–13:00 | ?utm_source=x&utm_medium=social&utm_campaign={slug}&utm_content=thread1 |
Thread + follow-up clip; reshare after 30/90 days |
| Newsletter | Tue 09:00 | ?utm_source=newsletter&utm_medium=email&utm_campaign={slug}&utm_content=feature |
Include top excerpt + CTA to blog; archive in digest |
| YouTube | Wed/Sat 18:00–20:00 | ?utm_source=youtube&utm_medium=video&utm_campaign={slug}&utm_content=short |
Full video → short clips → social posts over 60 days |
Understanding these principles helps teams move faster without sacrificing quality. When implemented correctly, this approach reduces overhead by making distribution and measurement repeatable and auditable.
Step-by-Step: Maintaining & Scaling Your Automated Calendar
To maintain an automated calendar, you need a clear governance model that defines ownership, monitors performance, and manages scaling to ensure automation grows steadily. Begin by identifying who is responsible for each part of the calendar, set up automatic health checks, and establish a formal change-control process for updates to prevent chaos from changes.
Prerequisites
- Stakeholder map: list owners for content types, channels, and automation scripts.
- Baseline metrics: current publish frequency, on-time rate, engagement benchmarks.
- Versioned automation: keep automation code and templates in a repo with tags.
Tools and materials
- Calendar platform (Google Calendar, Asana, or your CMS calendar plugin)
- Monitoring service (Datadog, PagerDuty, or simple cron-based checks)
- Source control (
git) and CI for automation templates - Runbook document (shared in Confluence, Notion, or similar)
- Establish SLA and ownership model
- Define SLAs for calendar entries: creation lead time (e.g., 7 days before publish), review turnaround (48 hours), and publish reliability (95% successful publishes).
- Assign an entry owner and a fallback approver for each content type; log owners as metadata on calendar events.
- Create an ownership registry that’s searchable and versioned.
- Implement health checks and monitoring alerts
- Automate checks that validate scheduled posts exist in the CMS, assets are attached, and metadata (title, tags, canonical) is present.
- Configure alerts for failures: critical (publish failed), warning (missing asset), info (metadata changed).
- Use simple HTTP or API probes plus email/Slack alerts; escalate to on-call according to SLA.
- Build a runbook and change-control process
- Document incident playbooks: detection, rollback steps, communications, and post-mortem owners.
- Require pull requests for automation changes with automated tests that validate calendar event creation and metadata.
- Schedule quarterly audits to prune stale entries and validate owner assignments.
Practical examples and checks
- Example check:
GET /api/calendar/events?date=2025-12-01returns status 200 and 10 events → success. - Example ownership tag:
owner:editor-janeon each event so automated reports identify accountability.
Operationalize scaling
- Start small: automate a single content stream, instrument it, then replicate patterns.
- Template library: keep reusable templates for event types to speed rollouts.
- Capacity planning: estimate publishing volume and add automation workers before hitting limits.
Understanding these controls lets teams expand the calendar confidently while reducing last-minute firefighting. When done well, the calendar becomes a predictable engine that frees creative teams to focus on content quality rather than scheduling logistics.
Useful link: Learn how to Scale your content workflow with AI-powered automation at https://scaleblogger.com for implementation patterns and turnkey pipelines.
Troubleshooting Common Issues
When an automation hiccups—failed triggers, missing media, scheduling conflicts—diagnosis needs to be fast and repeatable so content calendars don’t slip. Start by isolating the failure mode (trigger, asset, or scheduler), then run a short checklist: inspect the automation logs, confirm auth tokens, validate payloads or file paths, and run the same action in a safe test environment. That sequence stops guesswork and lets you apply targeted fixes like re-authenticating an integration, re-running a failed job, or correcting a cron expression.
Below are explicit steps, examples, and lightweight tests that avoid impacting production.
Immediate diagnostic checklist
- Check logs first: Automation platform logs and CMS error messages reveal whether the failure is upstream (webhook) or downstream (CMS media store).
- Validate credentials: Expired tokens and permission changes are frequent causes of silent failures.
- Confirm asset availability: Missing images often mean moved or renamed files or permission-restricted storage.
- Review schedule rules: Timezone mismatches and overlapping schedules create duplicates or missed publishes.
Step-by-step fixes and safe testing
- Reproduce locally in a sandbox:
- Clone the workflow to a test workspace or enable staging mode.
- Replace live credentials with a limited-scope test token.
- Re-authenticate integrations:
- Remove and re-add the OAuth connection in the platform settings.
- Confirm required scopes (
publish,media.upload,webhook.manage). - Re-run failed jobs:
- Use the platform “replay” or “rerun” feature for the failed trigger.
- If unavailable, trigger the webhook manually with a controlled payload.
bash
curl -X POST https://example-webhook.endpoint/test \ -H "Authorization: Bearer TEST_TOKEN" \ -H "Content-Type: application/json" \ -d '{"post_id":123,"action":"publish"}'- Inspect and fix payloads:
- If
image_urlpoints to a private bucket, update permissions or proxy download through your CMS. - For missing UTM parameters, patch templates to append
?utm_source={{source}}.
- Test without impacting production:
- Use a staging channel or a private Slack/webhook to capture outputs.
- Schedule test posts in a sandbox calendar set to “draft” status.
Error catalogue: symptom, likely cause, immediate check, fix, and verification step
| Symptom | Likely Cause | Immediate Check | Fix | Verification |
|---|---|---|---|---|
| Missing scheduled post | Cron/timezone mismatch or queue backlog | Check scheduler logs and timezone settings | Correct cron, clear queue, reschedule | Confirm next scheduled run in logs & test run |
| Webhook failed | Invalid signature, expired URL, or endpoint down | Inspect webhook delivery status and HTTP response | Update endpoint, rotate secret, retry delivery | 2xx response on manual curl and successful replay |
| Duplicate social posts | Overlapping schedules or retry logic | Check last-run timestamps and retry policy | Debounce triggers, set idempotency keys | No duplicates on two scheduled runs |
| UTM missing | Template or publishing pipeline strips query params | Inspect final URL in publish payload | Append UTM at template layer or CMS rewrite | Final published URL contains UTM tags |
| Image failed to upload | Permission error or file too large | Check storage ACLs and platform size limits | Fix ACLs, resize image, re-upload | Image accessible in media library and renders |
Understanding and practicing these checks makes troubleshooting routine instead of disruptive, and reduces firefighting time across the content pipeline. When patterns repeat, document the fix in runbooks so the team resolves the next occurrence in minutes rather than hours. For teams wanting to automate incident detection and replay at scale, consider integrating an AI content automation platform—Scaleblogger.com offers solutions to automate pipeline retries and performance benchmarking without replacing existing CMS workflows.
Tips for Success & Pro Tips
Treat reliability and ROI as essential parts of your design, not optional extras. Focus on predictable results, measurable outcomes, and repeatable processes so that content efforts can scale without causing chaos. Conduct small, focused experiments to minimize waste, and establish strong automation and clear guidelines to maintain value as production increases.
- Begin small and iterate fast (time: 1–4 weeks)
- Run pilot batches: Publish 5–10 automated posts using a single template and measure engagement.
- Measure one metric first: Choose either organic sessions, conversion rate, or time-to-publish and it before adding more KPIs.
- Scale incrementally: Double output only after meeting reliability thresholds for the pilot.
Practical reliability patterns
- Use retries and backoff: Implement exponential backoff for transient failures (start
1s, then2s,4s) and cap at 32–60s to avoid cascading failures. - Alert on business signals: Trigger alerts when
published_countdrops 20% week-over-week or when average time-to-publish exceeds SLA. - Circuit breakers: Stop automated pipelines when error rates exceed 5% for 15 minutes and require manual review.
Templates, naming conventions, and examples
- Template-first: Standardize content skeletons (title, intro, h2s, CTA, meta) so downstream systems parse reliably.
- Naming convention: Use
topic_cluster_contentType_date_v#— e.g.,saas_onboarding_guide_20251115_v1. - Metadata discipline: Always include
intent,audience, andtarget_kwfields for analytics and automated quality checks.
Code example — template snippet
json { "title": "", "intent": "informational", "audience": "product-managers", "target_kw": "", "publish_date": "", "version": 1 }Security and access checklist (quick)
- Rotate credentials: Use short-lived tokens and automated rotation. Least privilege: Grant publish/write only to pipeline service accounts. Audit logs: Retain action logs for 90+ days and review weekly.
- Secrets management: Store API keys in a secret manager, not environment variables.
Monitoring and ROI alignment
- Map cost to value: Tag content with expected CPA or CAC impact and review monthly.
- A/B test variations: Run headline and lead-paragraph tests on 10–20% of traffic to improve click-throughs.
Industry analysis shows teams that combine automation with disciplined guardrails reduce rework and improve throughput. Learn how to scale your content workflow with automation and governance at https://scaleblogger.com. Understanding these principles helps teams move faster without sacrificing quality.
📥 Download: Content Calendar Creation Checklist (PDF)
Measurement & Optimization
Start by defining a small set of outcome-focused KPIs tied directly to automation so the team can measure the value of the pipeline itself, not just raw traffic. Focus on metrics that show delivery velocity, quality lift, and business impact: publish success rate, time saved per article, engagement lift, SERP movement for target keywords, and automation accuracy (false positives/negatives in tagging or routing). These KPIs make it possible to scheduling rules and A/B tests with clear decision thresholds.
How to operationalize KPIs and A/B scheduling
- Weekly health checks: automated alerts for publish failures, queue backlog, and ingestion errors. Monthly cadence reviews: analyze per-channel performance and time-to-publish improvements. Quarterly audits: inspect automation rules, model drift, and content scoring thresholds.
- A/B test cadence: run controlled schedule experiments on send times and cadence per cluster. Annual governance: policy, data retention, and model refresh planning.
- Set measurement definitions
- According to draft.dev, Publish success rate: percentage of scheduled posts that publish without manual intervention.
- Research from singlegrain.com shows that Time saved per article: average editorial hours removed by automation (track via time logs).
- A recent study from brightspot.com found that Engagement lift: percent change in clicks, time on page, and scroll depth vs. baseline.
- According to relevanceai.com, Automation accuracy: percent of correctly auto-assigned tags/campaigns vs. human review.
- Build simple dashboards
- Use internal analytics and automation logs as primary data sources.
- Surface KPIs in a single view: calendar throughput, failure rate, engagement delta.
- Add filters for traffic cohort, topic cluster, and author/team.
, later publish time increases engagement by X%). Randomized assignment: split by content cluster, not by audience cookie. Sufficient run-length: minimum two content cycles Industry data suggests a sufficient run-length of (typically 4–8 weeks) to smooth editorial variance.
, 5% relative uplift) for rollout decisions.
Optimization roadmap: weekly, monthly, quarterly tasks and expected outcomes
Optimization roadmap for content planning optimization
| Timeframe | Task | Owner | Expected Outcome |
|---|---|---|---|
| Weekly | Health checks: queue depth, publish failures | Editorial ops lead | <2% publish failure; backlog <48hrs |
| Monthly | Cadence review: publish frequency by cluster | Content strategist | Identify 1–2 cadence shifts; +3–7% engagement |
| Quarterly | Automation audit: model drift, tagging rules | ML engineer + Content ops | Retrain models; reduce mis-tags by 10–20% |
| Quarterly | A/B test cycle: schedule/time experiments | Growth analyst | Measured lift per schedule; decision rule set |
| Annual | Governance & policy review | Head of Content | Updated SLAs, data retention, vendor review |
When practical, integrate this framework into your workflow automation: surface KPI alerts, schedule recurring A/B cycles, and log experiment outcomes. For teams scaling with AI, solutions like Scaleblogger.com can plug into this loop to automate measurement and benchmark performance across industries. Applying these rules reduces manual firefighting and focuses team time on the highest-impact content decisions.
Appendices: Templates, Runbooks, and Sample Field Mappings
This appendix provides copyable templates, sample payloads, and runbooks you can drop into an operational content pipeline. Use these artifacts to standardize scheduling, automate publishing triggers, and recover from common automation failures. Examples include a ready content calendar column set, a webhook JSON payload, a step-by-step failure runbook, and sample field mappings for CMS ingestion.
Table: Section Content — Resource, Format, Purpose & more
| Resource | Format | Purpose | Where to use |
|---|---|---|---|
| Calendar spreadsheet template | Google Sheets / Excel | Standardize editorial fields and publish workflow | Editorial planning, content ops |
| Webhook JSON example | .json |
Example payload to trigger publishing automation | CMS → CI/CD → Publishing API |
| Runbook checklist | PDF / Markdown | Step-by-step recovery for failed automations | SRE, content ops on-call |
| UTM template | CSV / Google Sheet | Standardized campaign tagging for analytics | Campaigns, social, paid distribution |
| Naming conventions | Markdown | Enforce file, slug, and asset naming rules | Repository, media library |
- Copyable calendar columns (paste into a new sheet)
Publish Date— ISO 8601 dateStatus— Draft/Review/Scheduled/PublishedAuthor— Full namePrimary Topic— Topic cluster IDPrimary Keyword— Target keywordTitle— SEO titleSlug— URL-safe stringCTA— Primary CTAUTM—utm_source=...&utm_medium=...
Sample webhook JSON for publishing automation:
json { "event": "publish_request", "content_id": "article-2025-11-30-001", "title": "How to Automate Content Pipelines", "slug": "automate-content-pipelines", "publish_at": "2025-12-02T09:00:00Z", "author": "Jane Doe", "metadata": { "topic_id": "topic-42", "primary_keyword": "content automation", "utm": "utm_source=newsletter&utm_medium=email" } }Runbook: handle failed publish (time estimate: 15–45 minutes)
- Check pipeline logs (
last 30m) and identify error code. 2.
If transient (HTTP 5xx), retry with exponential backoff up to 3 attempts. 3. If validation error, inspect metadata fields and fix slug/publish_at format.
- If asset missing, re-upload to media store and re-run webhook. 5.
Notify stakeholders with a short incident note and corrective action.
Sample field mappings for CMS import:
- Source
Title→ CMSheadline - Source
Publish Date→ CMSpublished_at(ISO 8601) - Source
Primary Keyword→ CMSseo.primary_keyword
For automated pipelines and deeper orchestration, embed these templates into your CI jobs or into an AI-assisted editorial system—Scaleblogger’s AI content automation can plug directly into these patterns to scale topic clusters and maintain naming discipline. Understanding and using these artifacts speeds rollout and reduces back-and-forth between editorial and engineering. This approach keeps teams shipping predictably and frees content leads to focus on strategy rather than manual fixes.
Conclusion
After working through the friction points — calendar chaos, slow approvals, and manual posting — the practical route forward becomes clear: standardize inputs, automate repeatable steps, and measure impact. Teams that standardized brief templates cut prep time; teams that introduced scheduled approvals reduced review cycles; teams that piloted API-driven posting recovered hours each week. Expect faster campaign launches, more consistent messaging, and clearer attribution when these changes are applied.
” — resolve when automation is paired with human-reviewed templates and staged rollouts: early wins appear in weeks, and quality improves as models learn brand voice.
For an immediate next step, audit one recurring workflow (content briefs, approvals, or publishing) and map which tasks are rule-based versus creative. Begin by automating a single, high-frequency task and measure time saved over a 30–60 day sprint; scale only after quality checks pass. For teams looking to end-to-end execution, platforms and services can accelerate setup and governance — Explore Scaleblogger’s automation services to accelerate your content calendar — a practical option for teams wanting hands-on support while retaining editorial control.
