

Cross-posting saves time. However, it can harm engagement if teams treat all channels the same. If captions, formats, or timing are not adjusted, reach decreases and audiences lose interest. Effective cross-posting maintains brand voice and increases scale.
It transforms one idea into several successful touchpoints.
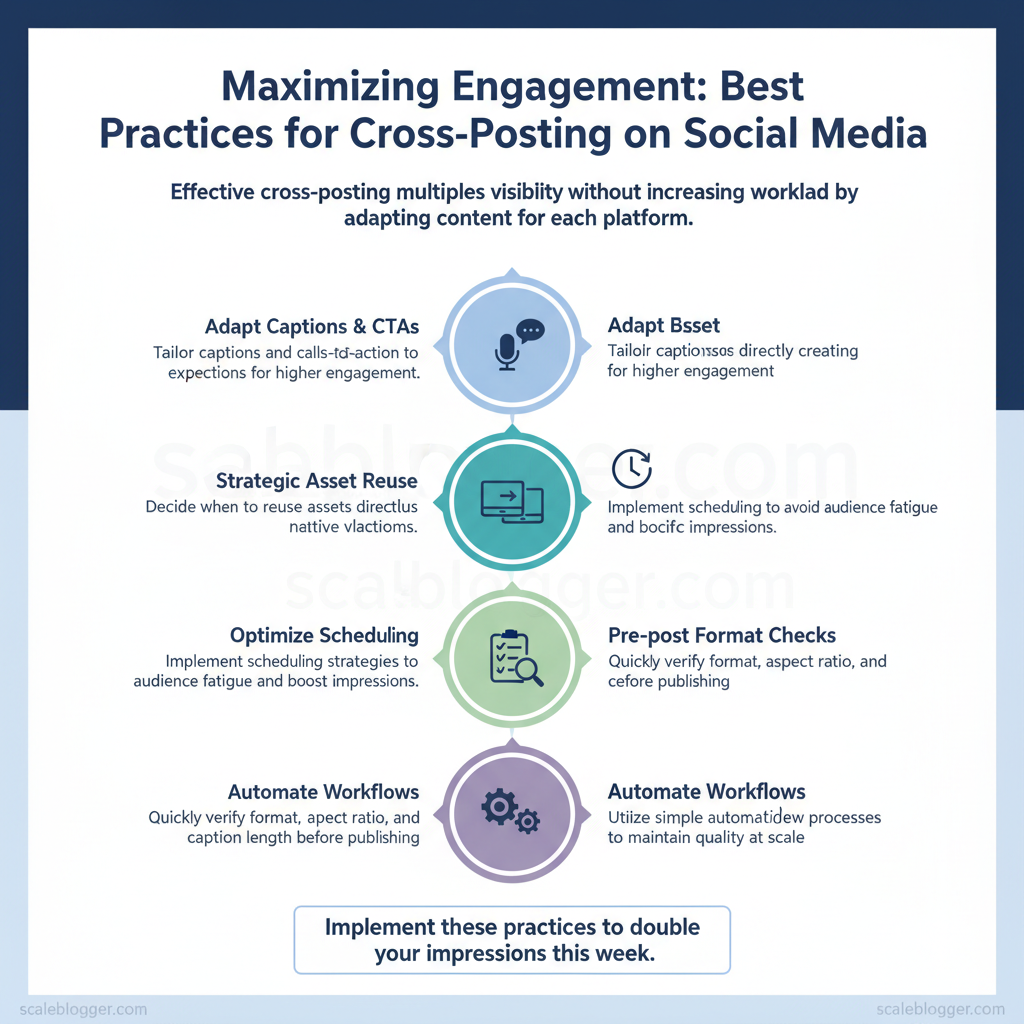
> Consistent repurposing + channel-specific tweaks multiplies visibility without multiplying work.
- How to adapt captions and CTAs for platform expectations
- When to reuse the same asset and when to create a native version
- Scheduling strategies that avoid audience fatigue and boost impressions
- Quick checks for format, aspect ratio, and caption length before posting
- Simple automation and review workflows that preserve quality at scale
Picture a small team that doubled impressions by tailoring three captions to platform tone and posting at staggered times. That kind of lift is often attributed to practical rules, rather than random guessing. Next, discover practices you can apply this week.
Try Scaleblogger to automate and your cross-posting workflow: https://scaleblogger.com
Table of Contents
> Key Takeaway:
Plan Your Cross-Posting Strategy
Begin by aligning your goals with the platforms your audience frequents. Cross-posting is not just about sending the same message everywhere.
Plan Your Cross-Posting Strategy
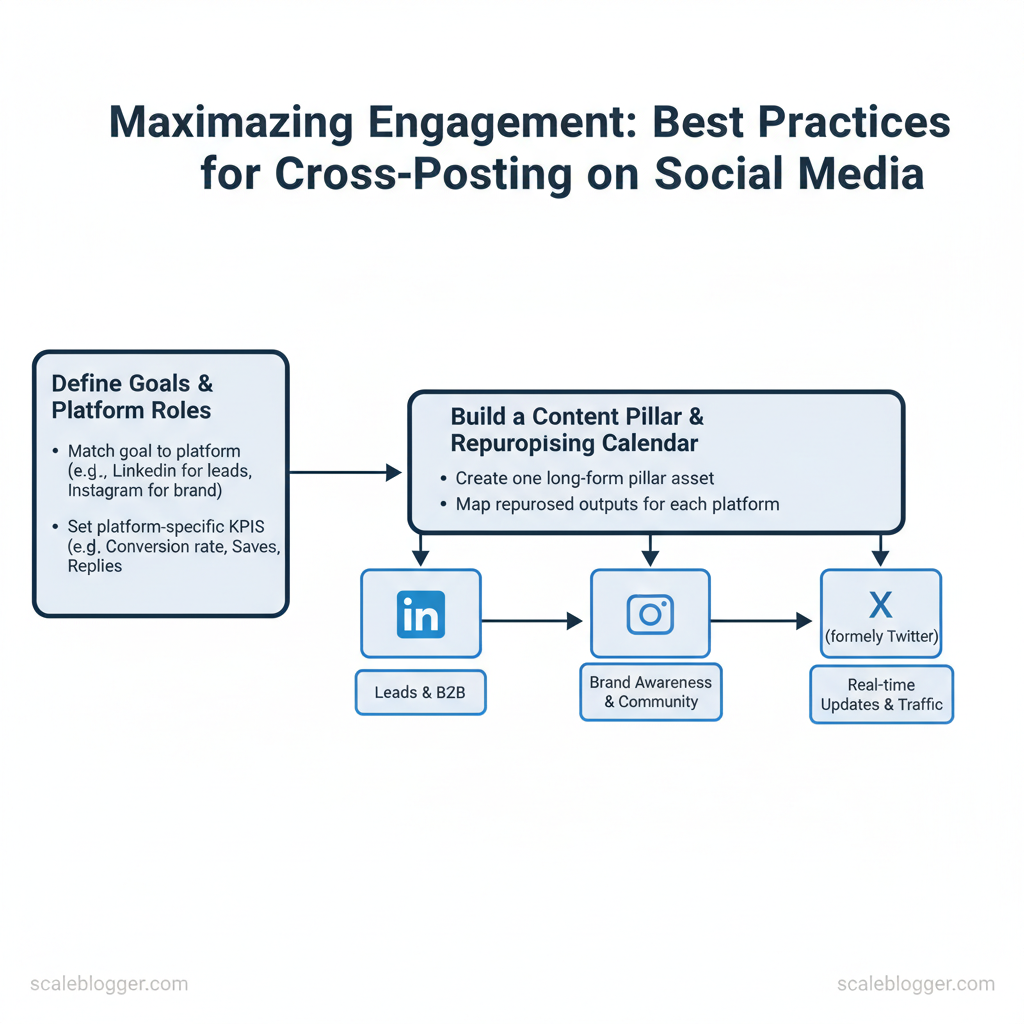
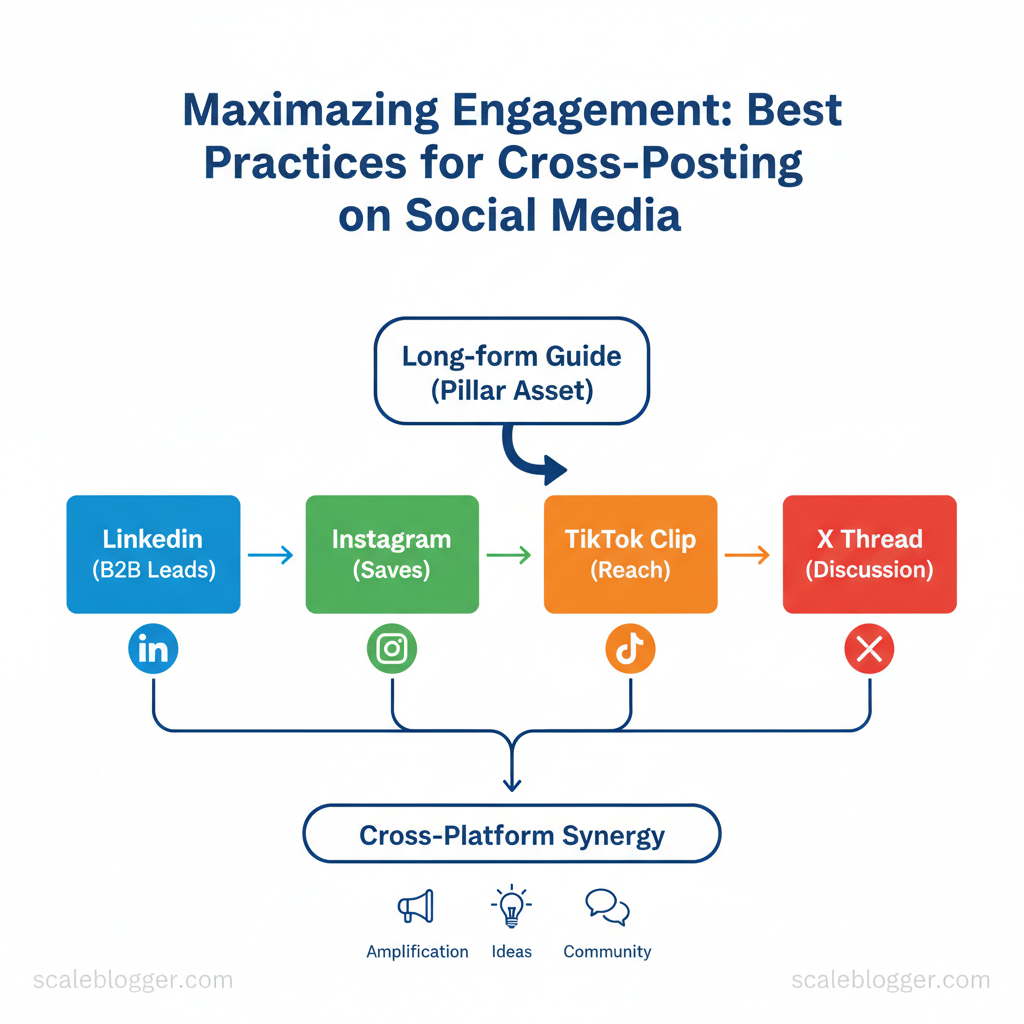
Begin by aligning your goals with the platforms your audience frequents. Cross-posting is not just about sending the same message everywhere. It involves adapting one strong source asset so each platform supports a different goal. Define platform roles, attach measurable KPIs, then build a repurposing calendar that runs off a single long-form pillar piece.
Define Goals and Platform Roles
- Match goal to platform — Use each network for what it does best, not what you wish it did. For instance, use LinkedIn for thought leadership and lead generation, Instagram for visual storytelling, and TikTok for discovery. com/resources/how-to-crosspost/).
- Set platform-specific KPIs — Track reach and impressions for discovery platforms, CTR and conversions for lead-focused channels, and comments/saves for community signals. Avoid being everywhere with identical posts — Audiences expect different norms; reuse ideas, not exact copy.
Build a Content Pillar & Repurposing Calendar
- , Growth Tactics, Case Studies, Tool How‑Tos, Industry Trends, Quick Wins). 2.
Create one long-form pillar asset (guide, research post, or webinar transcript) as the canonical source of truth. 3. Map repurposed outputs for each platform: convert sections into carousel slides, short clips, tweets/threads, email excerpts, or short-form video.
- Schedule cadence: pillar → week 1 amplification (long-form + LinkedIn article) → week 2 repurposes (3–5 Instagram posts, 3 TikToks, 5 Tweets) → ongoing micro-updates. 5.
Automate where useful — use scheduling and content pipelines to queue formatted variants; this is where services that automate scheduling and publishing can cut friction.
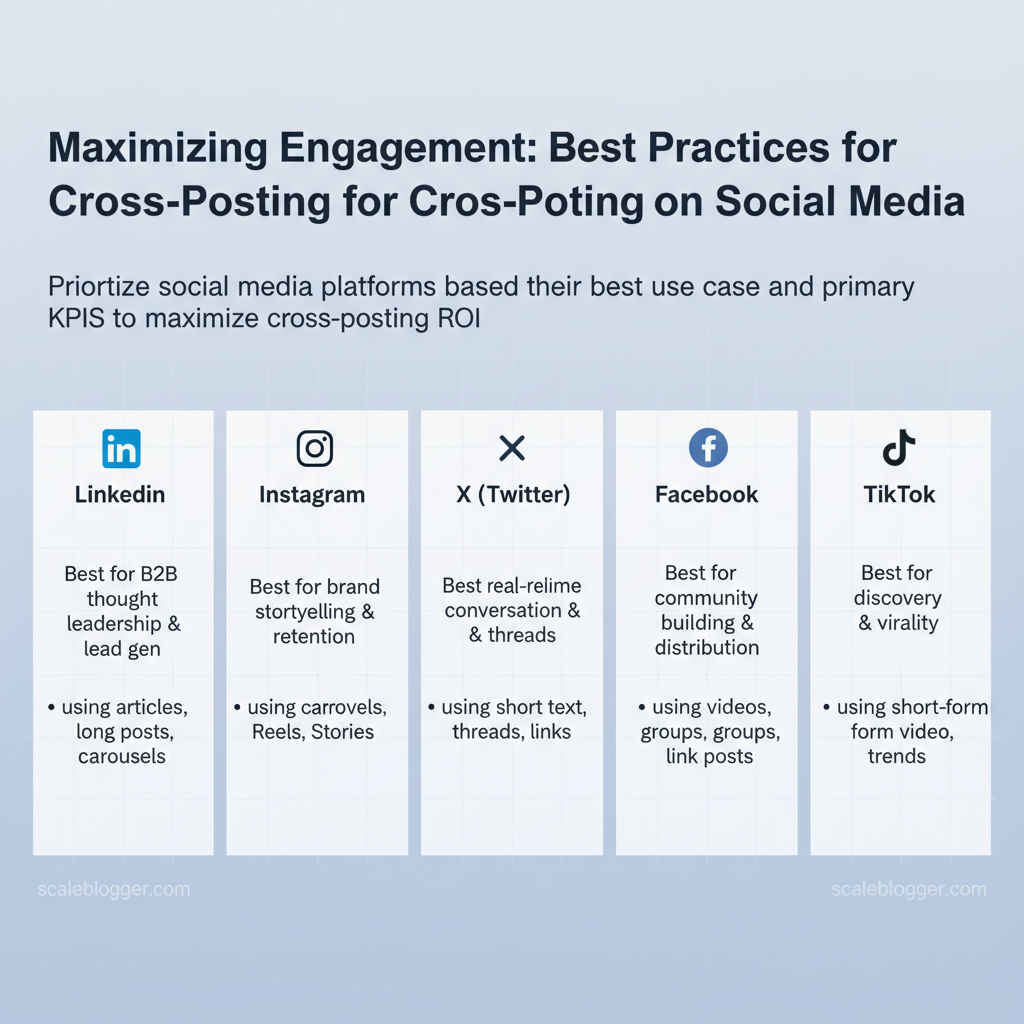
Practical repurpose examples Common platforms by best-use case and primary KPI to help readers select where to prioritize cross-posting efforts
Section of guide → Instagram carousel for saves. Webinar clip → TikTok for reach.
Key insight: Prioritize platforms by where your audience converts and what content format you can consistently produce. Mapping one pillar asset to multiple platform-specific outputs preserves brand voice while maximizing ROI.*
Platform
Best Use Case
Ideal Content Type
Primary KPI
LinkedIn
B2B thought leadership & lead gen
Articles, long posts, carousels
Conversion rate / Leads
Instagram
Brand storytelling & retention
Carousels, Reels, Stories
Saves / Engagement rate
X (Twitter)
Real-time conversation & threads
Short text, threads, links
Replies / CTR
Facebook
Community building & distribution
Videos, groups, link posts
Reach / Shares
TikTok
Discovery & virality
Short-form video, trends
Views / New followers
Understanding these principles helps teams move faster without sacrificing quality. When implemented thoughtfully, a single well-crafted asset can fuel weeks of platform-appropriate content.
> Key Takeaway:
Craft Platform-Specific Copy and Creative
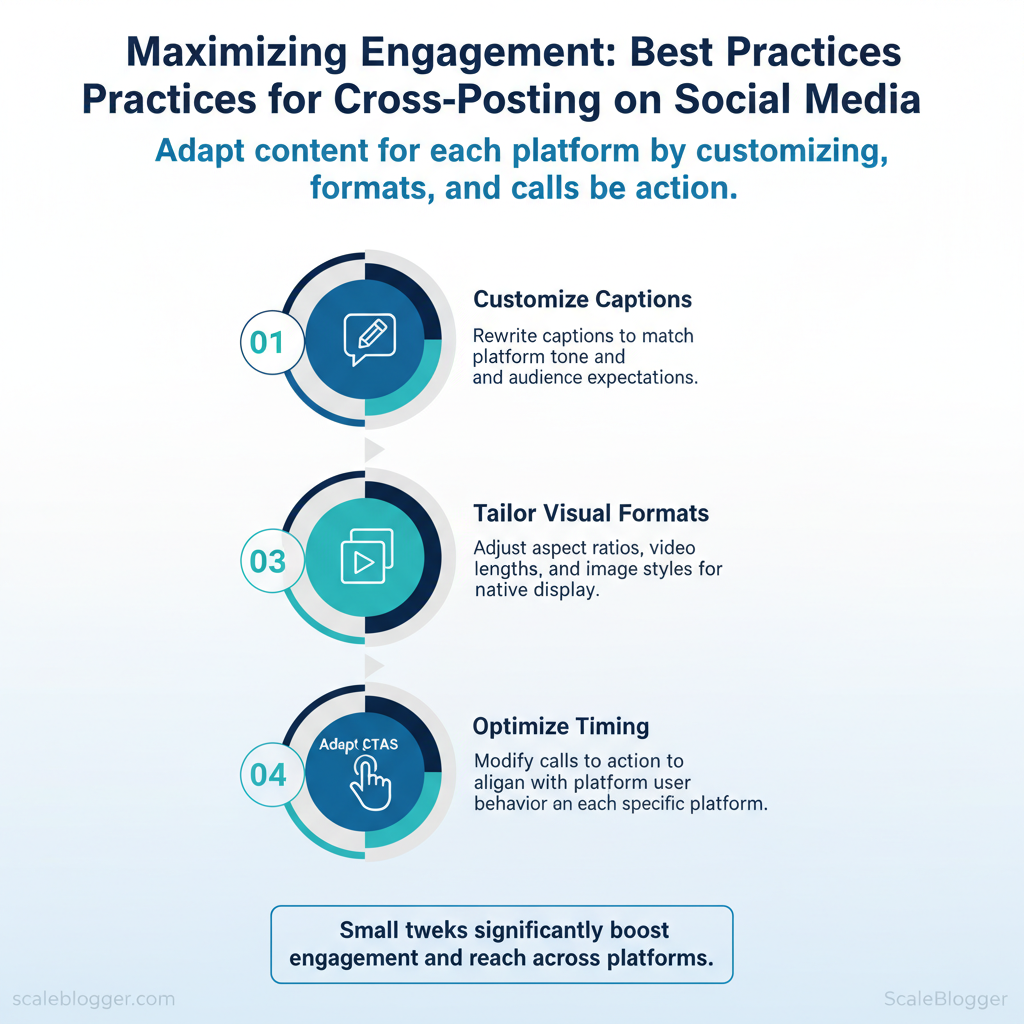
Create for the platform, not just repurpose. Start every asset by asking: what behavior am I asking for here — click, watch, save, comment, or sign up? That single question drives copy tone, CTA urgency, visual crop, and hashtag use.
Tailor Your Copy and Tone for Each Platform
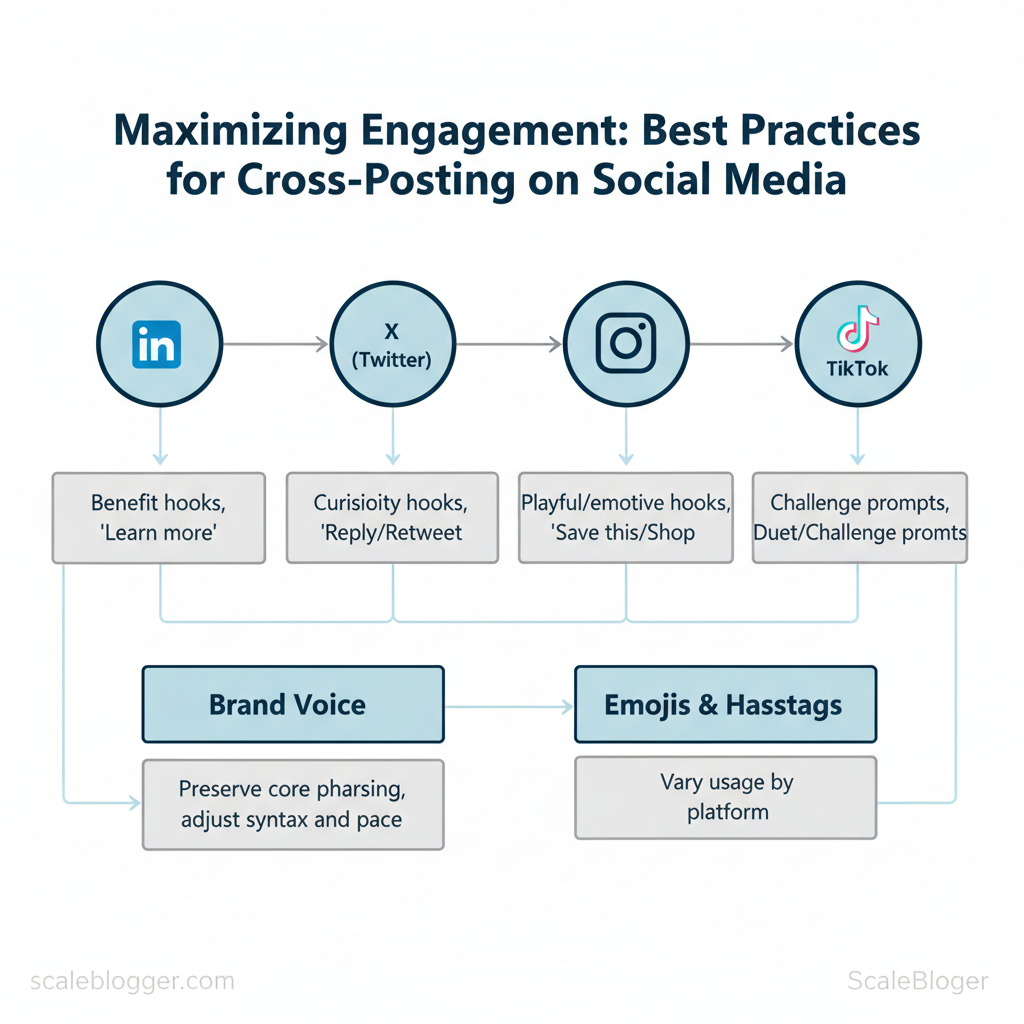
- Platform hooks: Use direct benefit hooks on LinkedIn, curiosity or relatability on X, playful/emotive hooks on Instagram, and immediate action or challenge prompts on TikTok. Adjust without losing brand voice: Preserve your brand’s core phrasing (key words, personality) but swap syntax and pace per network — longer sentences and credibility cues on LinkedIn; short, punchy lines for X and TikTok. CTAs by platform: Use
Learn more/Read case studyfor LinkedIn,Save thisorShopon Instagram,Reply/Retweetfor X, and duet/challenge prompts on TikTok.
- Emojis & hashtags: Use sparingly on LinkedIn, moderately on Facebook and Instagram, and liberally on TikTok — but tailor the meaning (use emojis to replace words or signal tone, not as decoration). A/B-ready templates: Create 3 headline variants per post:
Benefit-first,Curiosity,Social-proofto speed testing.
Visuals: Resize, Reformat, and Reframe
- ,
9:16for TikTok/Reels,1:1for Instagram feed,16:9for Facebook/YouTube) and export from the master file. 2.
Reframe the composition — shift subject to the safe zone for each crop; don’t simply center-crop. 3. Create 3 thumbnails per video: one with text overlay, one with close-up face, one with graphic CTA.
- Add captions and alt text on every platform for accessibility and SEO. 5.
264 export with target bitrates for fast mobile loading.
> “Customize your captions” — guidance on cross-posting best practices from Iconosquare (use different captions per platform rather than identical copy). > (See: Iconosquare — 6 Best Practices for Cross Posting on Social Media)
Quick reference for copy length, tone, and hashtag usage by platform to speed writer decisions
| Platform | Recommended Tone | Typical Length | Hashtag Strategy |
|---|---|---|---|
| Professional, insightful | 100–300 words | 3–5 industry tags, use branded hashtag | |
| Conversational, visual-first | 100–150 characters + longer caption optional | 5–10 niche tags + 1 branded tag | |
| X (Twitter) | Concise, timely, witty | 20–40 words | 1–3 trending tags, mention handles |
| TikTok | Energetic, short-form storytelling | 20–60 characters (visual focus) | 3–7 tags incl. trend tags |
| Informal, community-oriented | 40–80 words | 2–5 tags, boost with share prompts |
Practical tip: plug these rules into your content pipeline (scheduling, asset names, thumbnail templates). If you automate scheduling, include platform-specific fields for ratio, caption_variant_1, and thumbnail_1 so teams can publish without manual edits. Understanding these principles helps teams move faster without sacrificing quality.
When implemented correctly, this approach reduces overhead by making decisions at the team level.
> Key Takeaway:
Scheduling, Automation, and Tools
Choosing the right scheduler means matching platform capabilities to your workflow: pick tools that post natively where your audience lives, give analysts…
Scheduling, Automation, and Tools
Choosing the right scheduler means matching platform capabilities to your workflow: pick tools that post natively where your audience lives, give analysts real metrics, and let teams collaborate without bottlenecks. Start with those priorities and let cost, scale, and approval needs decide the final pick.
Side-by-side comparison of common scheduling tool feature sets to guide selection based on needs (team collaboration, analytics, native posting) — best social media scheduler, cross-posting tool
| Tool | Native Posting | Analytics | Team Collaboration | Price Tier |
|---|---|---|---|---|
| Hootsuite | ✓ Major platforms, RSS | ✓ Advanced reports | ✓ Roles & approvals | $99+/month |
| Sprout Social | ✓ Full native posting | ✓ Deep analytics | ✓ Workflow + approvals | $249+/month |
| Buffer | ✓ Core platforms | ✓ Post performance | ✓ Simple approvals | $6–$120+/month |
| Later | ✓ Instagram, TikTok scheduling | ✓ Visual calendar analytics | ✗ Limited team roles | $18+/month |
| Loomly | ✓ Native posting + drafts | ✓ Post-level insights | ✓ Approval flows | $26+/month |
| Agorapulse | ✓ Native posting | ✓ Social inbox analytics | ✓ Shared inbox & approvals | $79+/month |
| SocialBee | ✓ Native posting | ✓ Category analytics | ✓ Multi-user plans | $19+/month |
| HubSpot (Social) | ✓ Native for major nets | ✓ Integrated CRM analytics | ✓ Enterprise workflows | $50+/month (Marketing Hub) |
| Zapier | ✗ Not a scheduler | ✗ Depends on integrations | ✓ Automations between apps | Free–$29+/month |
| ContentStudio | ✓ Native posting | ✓ Content + influencer analytics | ✓ Team workflows | $49+/month |
Practical selection checklist and guardrails:
- Prioritize native posting to avoid API reposting limits and higher reach. Balance price vs. needs — don’t pay enterprise rates for single-user publishing.
- Choose approval workflows when posts are high-visibility or regulated. Automate distribution only; leave voice, brand tone, and crisis responses to humans. Set time-window gates: schedule drafts to require review
24–48hbefore publish.
- Monitor post-performance daily the first two weeks after schedule changes. Use
Zapieror native APIs for cross-post triggers, not tone generation. * Log every automated post to a shared spreadsheet or Slack channel for traceability.
- Create a simple approval flow: draft → editor review → legal check (if needed) → publish.
- Add a monitoring step: rule-based alerts for spikes or negative sentiment.
Below is a minimal webhook example to notify Slack on publish:
json POST /hooks/slack { "text": "Post published: {{post_title}} — {{url}}" }for Engagement and Algorithm Signals
Start by treating algorithms as pattern detectors: they reward content that gets attention quickly and keeps people interacting. That means timing, frequency, and the invitation to engage are as important as the creative itself. Use analytics to find your peak windows, stagger cross-posts instead of blasting identical updates at once, and design micro-prompts that ask for low-effort responses (one-tap reactions, quick polls, or yes/no replies).
According to Buffer, pulling 7–14 day engagement windows from platform insights helps identify peak minutes, not just peak days. Wait 1–6 hours between platforms and adapt captions so each audience gets a native-feeling post. Frequency should follow engagement curves; when reach or comments drop, reduce repetition.
Run two versions (different CTAs or thumbnails) for 24–48 hours and double down on the winner.
- Native Features and Rich Media
- Prioritize native formats (platform-specific reels/shorts, carousels) to get algorithm preference.
- Repurpose long-form into short-form. Convert a 900-word post into a 30–60 second reel and a 5-slide carousel.
- Use platform features. Polls, questions, countdown stickers, and pinned comments create algorithmic triggers.
- Keep thumbnails and first 3 seconds tight. Algorithms penalize high drop-off in the critical opening window.
- Automate publishing for consistency. Scheduling tools that post native formats increase reliability and lower human error—Scaleblogger’s automated pipeline can help standardize this process while benchmarking performance.
Which native features (Reels, Stories, Carousels, Lives) are best for specific engagement goals (comments, shares, saves)
Table: Section Content — Feature, Best For, Typical Engagement Lift & more
| Feature | Best For | Typical Engagement Lift | Usage Tip |
|---|---|---|---|
| Reels / Shorts | Reach & shares | 2–3x organic reach vs feed posts | Lead with a hook first 3s; subtitles on-screen |
| Stories | Quick interactions & polls | 20–40% higher tap engagement | Use stickers (polls/questions) and link CTAs |
| Carousels | Saves & dwell time | 1.5–2x saves vs single image | Design sequential storytelling; ask to swipe |
| Live Streams | Real-time comments & loyalty | Peak concurrent engagement spikes | Promote in advance; use guest co-hosts |
Understanding these levers helps you shape content that both people and platforms respond to, so teams can move faster without sacrificing quality. When implemented correctly, this approach reduces wasteful posting and amplifies the content that actually moves metrics.
Measure, Test, and Iterate
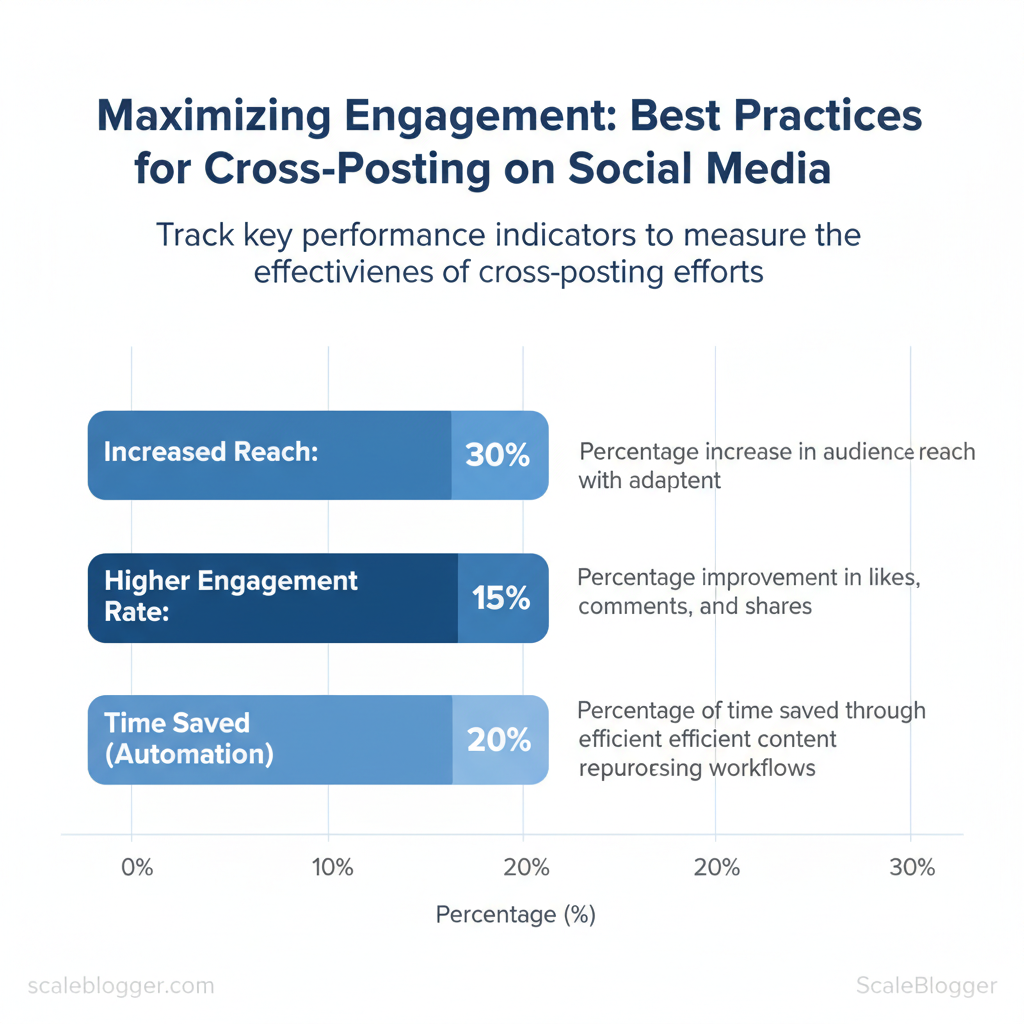
Start by treating measurement as the nervous system of your content program: it feeds performance back into decisions so you can prune what’s failing and scale what’s working. Define a small set of actionable KPIs tied to the business goals you set earlier—traffic, engagement, leads, or revenue—and commit to a reporting cadence that separates tactical fixes from strategic shifts.
- Align KPIs to goals — map each metric to a specific objective (awareness, engagement, conversion).
- Use UTM parameters and link shorteners like
bit.lyto preserve attribution across platforms. - Report weekly for tactical changes and monthly for strategy-level course corrections.
- Automate collection with platform APIs and dashboards so the team spends time on insight, not spreadsheets.
> “Customize your captions” — Iconosquare’s guide on cross-posting recommends tailoring copy and format per platform to avoid engagement decay: https://www.iconosquare.com/blog/6-best-practices-for-cross-posting-on-social-media
- A/B testing process
- Pick one variable (headline, image, CTA) to test — only one at a time.
- Define success metric and required sample size or time window; avoid prematurely stopping tests.
- Run the test until statistical power or a pre-set time period is reached, then document the outcome.
- Translate winners into the editorial calendar: update asset templates, repurpose across channels, and schedule follow-ups.
Practical testing tips:
- Use
controlandvariantnaming conventions in your CMS. - For social experiments, run identical posts with different captions or images across similar audience cohorts.
- If traffic volumes are low, extend duration rather than test multiple variables at once.
Sample KPI dashboard layout showing what to track weekly vs monthly and which tools can surface each metric
| Metric | Goal | Reporting Frequency | Recommended Tool |
|---|---|---|---|
| Impressions | 50,000/mo | Weekly (trend) / Monthly (strategy) | Platform analytics (Instagram Insights, X Analytics), Iconosquare, Buffer |
| Engagement Rate | 2–5% | Weekly (alerts) / Monthly (benchmarks) | Sprout Social, Hootsuite, Platform analytics |
| Clicks / CTR | 1.5% CTR | Weekly (campaigns) / Monthly (channel mix) | Google Analytics 4, Bitly, Buffer |
| Conversions | 2% conversion rate | Weekly (micro-goals) / Monthly (funnel review) | Google Analytics 4 (UTMs), HubSpot, GA4 conversions |
| Saves / Shares | 500+/mo | Weekly (content winners) / Monthly (repurpose list) | Platform analytics, Iconosquare, Sprout Social |
Understanding these cycles lets you turn small wins into repeatable playbooks and stop investing in tactics that aren’t producing. When implemented, this approach reduces rework and helps teams prioritize high-impact creative.
📥 Download: Cross-Posting Strategy Checklist (PDF)
Governance, Compliance, and Scaling Teams
Start by formalizing who does what and how decisions flow so content velocity doesn’t become a risk. A brief, shared playbook standardizes metadata. Use audience, platform, pillar, and KPI to keep creators on the same page. Use role-based permissions in your CMS and scheduling tools so approvals are enforced by the platform, not memory.
Keep approval cycles short—ideally 12–48 hours for routine posts—so timeliness and compliance coexist.
Create Playbooks and Approval Workflows — practical elements to include:
- Metadata templates: required fields
audience,platform,pillar,KPI,publish_date. Role-based permissions: map who cancreate,edit,approve,publishin tools like Buffer, Hootsuite, Sprout Social. Short approval SLAs: setApproval Windowtargets and automate reminders.
- Content rubrics: quick checklists for legal, brand voice, and factual accuracy. Version control: keep last three approved versions and changelog for audits. Automation rules: auto-schedule recurring posts, but require fresh approval for sensitive topics.
- Accessibility checks: require alt text, readable captions, and transcript links where appropriate. Crisis pause protocol: one-click
pause_and_reviewin publishing tools for rapid takedowns.
- Standardize the playbook document and host it where teams already work.
- Assign clear owners in the playbook for
create,review,approve,publish. - Configure tool permissions to match the role matrix so approval gates are technical, not just cultural.
- Run quarterly audits of approval times, compliance flags, and accessibility misses.
Role matrix that maps responsibilities (create, review, approve, publish) to team members and tool capabilities to prevent overlap (social media governance, approval workflow)
| Role | Responsibility | Approval Window | Tool/Permission |
|---|---|---|---|
| Content Creator | Drafts posts, writes captions, provides audience & KPI metadata |
24–48 hours for routine content | Buffer/Hootsuite editor; Can Create + submit for review |
| Editor | Edits for voice, clarity, accessibility (alt text, captions) | 12–24 hours for copy edits | CMS editor + Grammarly/Accessibility plugin; Can Edit |
| Approver / Legal | Reviews claims, sponsorship labels, contract quotes; final legal sign-off on paid/sponsored content | 48–72 hours for legal review on complex items; 12–24 hours for standard | Shared review queue in Asana/Confluence; Can Approve in publishing tool |
| Publisher | Schedules/publishes, executes crisis pause_and_review, monitors live engagement |
<12 hours for time-sensitive posts | Sprout Social/Buffer with Publish permission; ability to Pause posts |
For compliance and accessibility, always label sponsored content clearly and follow platform disclosure rules. Require alt text and readable captions; prefer plain-language summaries for video transcripts. For crises, create a one-click pause_and_review protocol in your scheduling tool, plus a short decision tree: assess reputational risk → pull or revise → legal review if needed → republish with context.
Automate alerts for keywords that might trigger the protocol so response is fast.
When governance is baked into tools and playbooks, teams scale without constant hand-holding. Understanding these principles helps teams move faster without sacrificing quality.
Conclusion
You’ve seen how small changes—tailoring captions, adapting format per channel, and timing posts to each audience—keep cross-posting efficient without killing engagement. Teams that adjusted messaging and A/B-tested posting windows recovered audience attention, and applying lightweight automation for scheduling frees time for creative iteration. If you’re unsure where to start, audit last month’s top posts to identify repurposing candidates and pick one platform to first.
- Audit top content: Find 3–5 high-performing posts and adapt their format and captioning for other channels.
- Test timing and tone: Run short experiments to see which variations lift reach.
- Automate routine tasks: Use scheduling and template rules so your team focuses on creative improvements.
If you want to speed implementation, Try Scaleblogger to automate and your cross-posting workflow — it streamlines scheduling, variant creation, and performance tracking so you can scale consistent, channel-native content without extra headcount. As Iconosquare’s best-practice research notes, thoughtful cross-posting preserves reach while saving time.
